Category: How-Tos

  • Why Mitutoyo Measuring Equipment Is a Machinist’s Best Friend

    Why Mitutoyo Measuring Equipment Is a Machinist’s Best Friend

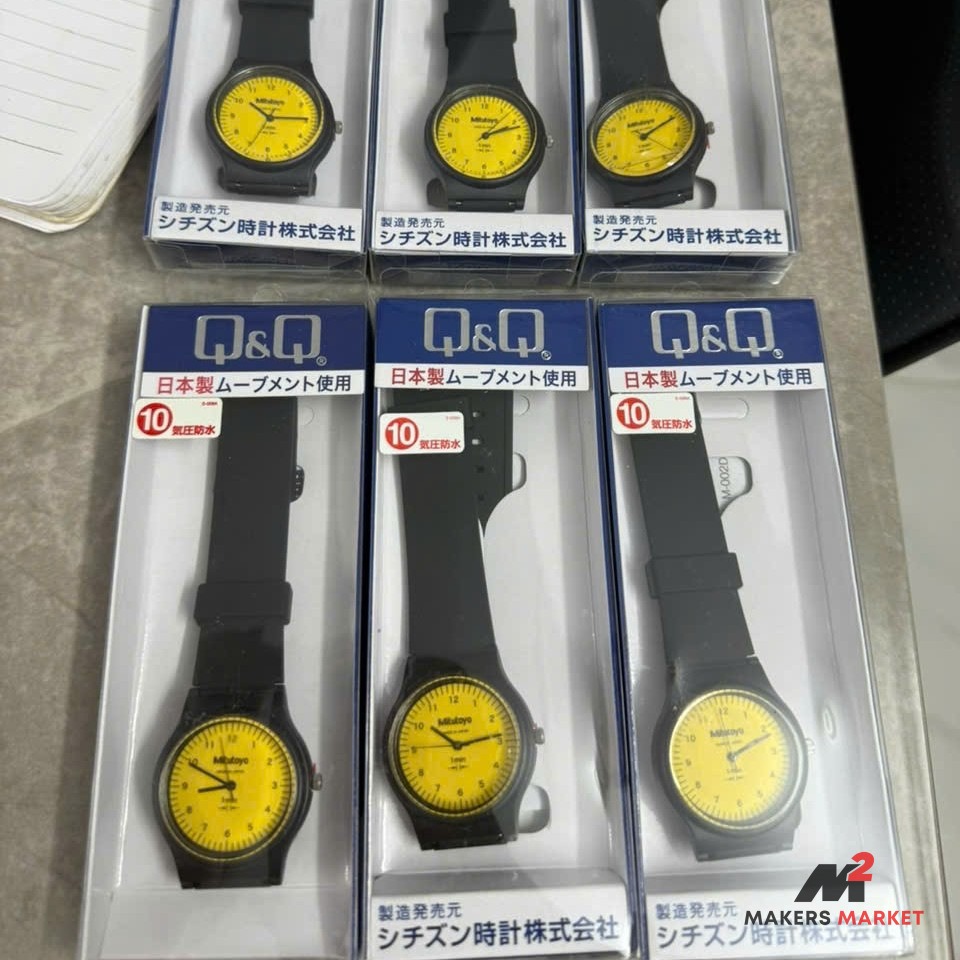
    When it comes to precision, few names carry the weight of Mitutoyo. For decades, this Japanese brand has set the gold standard in measuring tools, earning a cult following among machinists, engineers, and hobbyists alike. At Makers Market AU, we’re proud to stock high-quality used Mitutoyo measuring equipment—think micrometers and dial gauges that deliver pinpoint accuracy without breaking the bank. Here’s why Mitutoyo gear is a cut above and why our second-hand stock is a steal for Aussie workshops.

    Precision You Can Trust

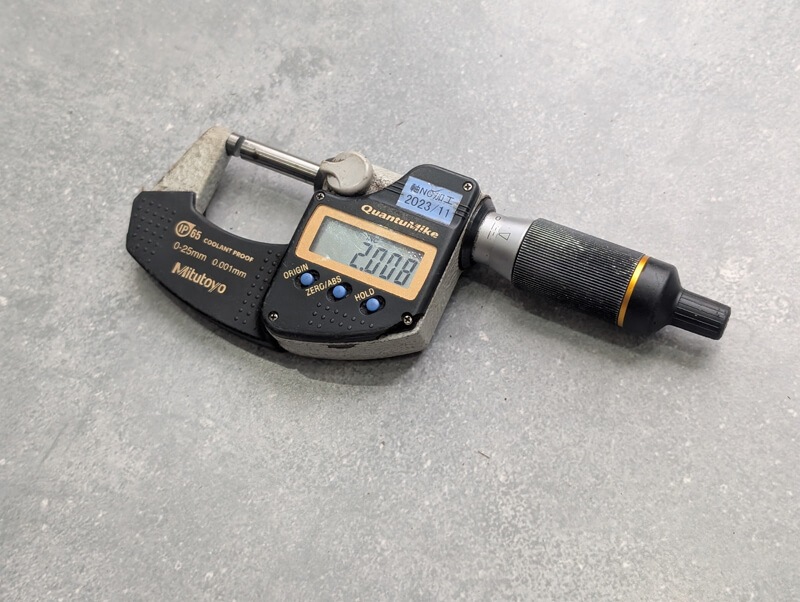
    Mitutoyo isn’t just a brand; it’s a promise. Their micrometers, for instance, measure down to the micron—0.001mm of accuracy that ensures your work is spot-on every time. Whether you’re machining parts for a custom build or fine-tuning a prototype, a Mitutoyo micrometer gives you confidence in every turn of the thimble. Dial gauges are no different, offering smooth, reliable readings that stand up to heavy use. It’s no wonder pros across Australia swear by them.

    Built to Last

    One thing that sets Mitutoyo apart? Durability. These tools are engineered with Japanese precision and toughness in mind. Even our used Mitutoyo micrometers and dial gauges at Makers Market AU show up in stellar condition—lightly worn but fully functional. We inspect every piece to ensure it meets the brand’s legendary standards. You’re not just buying a tool; you’re investing in gear that’ll last through countless projects.

    Affordable Quality at Makers Market AU

    Brand-new Mitutoyo equipment can come with a hefty price tag—out of reach for many hobbyists or small workshops. That’s where we come in. At Makers Market AU, we source top-tier used Mitutoyo measuring tools and pass the savings on to you. Our stock of micrometers and dial gauges delivers that pro-grade performance at a fraction of retail cost. Plus, with fast shipping across Australia, your next precision tool is just a click away.

    Micrometers: The King of Measurement

    Let’s talk micrometers—Mitutoyo’s crown jewel. These beauties are perfect for measuring outside diameters, thicknesses, or anything requiring razor-sharp precision. With features like ratchet stops for consistent pressure and carbide-tipped anvils for wear resistance, they’re a machinist’s dream. Our used Mitutoyo micrometers might have a few scratches, but their accuracy? Untouched. Browse our range and see why they’re a workshop must-have.

    Dial Gauges: Smooth and Steady

    Need to check runout or flatness? Mitutoyo dial gauges have you covered. Their smooth needle movement and clear, readable dials make them a go-to for quality control or setup tasks. Even second-hand, these tools hold their own, offering reliable readings you can stake your work on. At Makers Market AU, we’ve got a rotating stock of used dial gauges ready to ship—perfect for keeping your projects on point.

    Why Buy Used Mitutoyo Gear?

    Buying used doesn’t mean compromising. Mitutoyo’s build quality means these tools age like fine wine—still precise, still dependable. Plus, you’re scoring premium equipment at prices that leave room in your budget for more tools (or that extra coffee run). Every piece we sell is quality-checked, so you’re getting the real deal, minus the retail markup.

    Ready to Upgrade Your Workshop?

    If you’re in Australia and hunting for affordable precision, our used Mitutoyo measuring equipment is calling your name. From micrometers that nail tight tolerances to dial gauges that keep your setups flawless, Makers Market AU has the tools to elevate your craft. Stock moves fast, so don’t wait—shop our Mitutoyo range now and see why machinists trust us to deliver.

  • Steel Temperature Guide

    Steel Temperature Guide

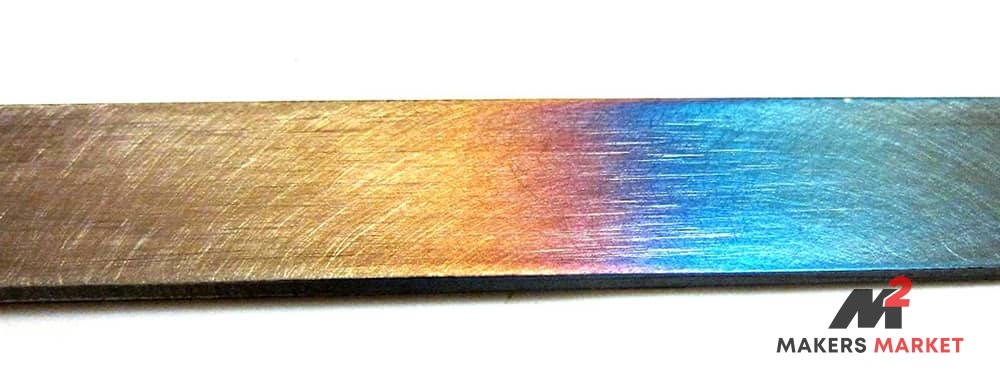
    Colour chart for forging and hardening.

    Temperature Guide

  • Differences Between Carbide & HSS

    Differences Between Carbide & HSS

    Cutting tools are an essential component in machine shops, as they are responsible for cutting and shaping various materials. Two of the most commonly used cutting tools in the industry are carbide and high-speed steel (HSS) tools. In this article, we will compare and contrast carbide and HSS cutting tools to help you understand the differences between the two.

    Composition

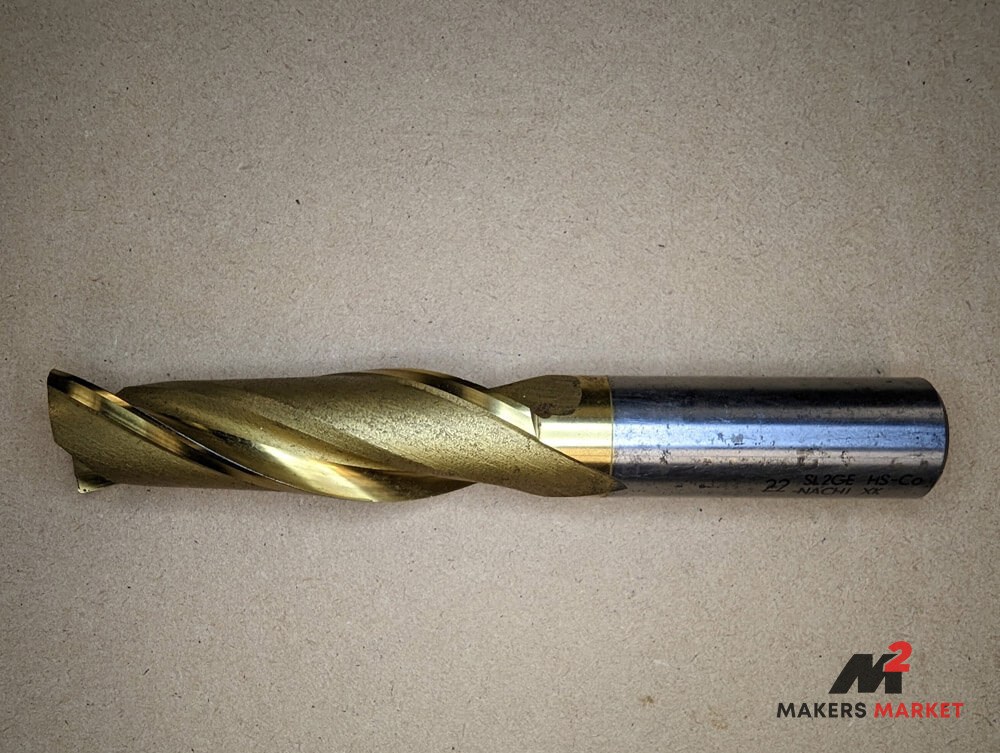
    Carbide cutting tools are made of tungsten carbide, a hard and dense material that is made by combining tungsten with carbon. On the other hand, HSS cutting tools are made of high-speed steel, which is a type of steel that is specifically designed to resist heat and abrasion.

    Hardness

    Due to their high-speed steel composition, HSS cutting tools are more resistant to heat than carbide cutting tools. This makes them a good choice for cutting operations that generate a lot of heat, such as drilling and tapping. Carbide cutting tools, on the other hand, are more susceptible to heat damage, which can lead to their degradation over time.

    Cost

    Carbide cutting tools are typically more expensive than HSS cutting tools. This is due to the higher cost of the tungsten carbide material and the complex manufacturing process required to make carbide cutting tools. HSS cutting tools are less expensive and can be a good choice for machine shops that are working on a tight budget.

    Longevity

    Carbide cutting tools are more durable than HSS cutting tools and can last longer, especially when cutting tough and abrasive materials. HSS cutting tools, on the other hand, are more prone to wear and tear and may need to be replaced more frequently.

    In conclusion, the choice between carbide and HSS cutting tools depends on the specific requirements of the cutting operation. Carbide cutting tools are best suited for cutting tough and abrasive materials, while HSS cutting tools are better for cutting softer materials and operations that generate a lot of heat. The cost of the cutting tool and its durability should also be considered when making a decision.

  • Machine Tapers

    Machine Tapers

    Machine tapers are mechanical connections between a machine tool spindle and the tool holder that is being used. There are several common types of machine tapers, including:

    1. Morse Taper

      This is one of the most common machine tapers and it is characterized by a series of tapered cones, with the largest at the tool holder end and the smallest at the spindle end.

    2. Brown & Sharpe Taper

      This type of machine taper is similar to the Morse taper, but it has a slightly flatter taper angle and is generally used for smaller tools.

    3. Brown & Sharpe Taper

      This type of machine taper is similar to the Morse taper, but it has a slightly flatter taper angle and is generally used for smaller tools.

    4. JT Taper

      The Jarno Taper, or JT taper, is characterized by a single taper angle and a constant taper rate. It is commonly used for larger tool holders and provides a high level of accuracy and rigidity.

    5. R8 Taper

      The R8 taper is a type of taper commonly used in milling machines. It has a 7:24 taper angle and a threaded end for attaching tool holders.

    6. SK Taper

      The SK taper is a type of taper that is commonly used in Europe and Asia. It is similar to the Morse taper, but it has a flatter taper angle and a keyway for added stability.

    JT Taper on a 40 Taper Arbor
  • Metal Lathe: A Guide to Safe and Effective Use

    Metal Lathe: A Guide to Safe and Effective Use

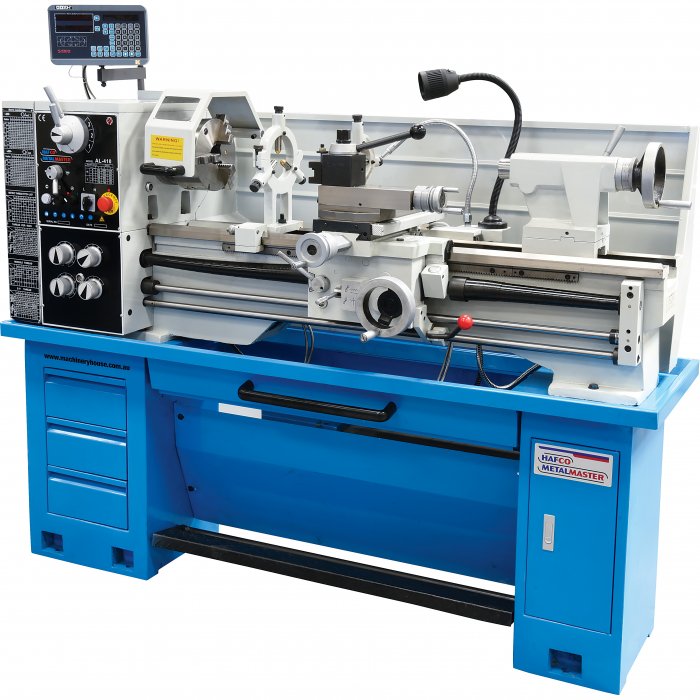
    A metal lathe is a versatile machine tool used to shape metal and other materials into various shapes and sizes. It is commonly used in the production of parts for machines and other products. The metal lathe has been in use for hundreds of years, and it remains a popular tool in metalworking and machining today.

    To use a metal lathe safely and effectively, it is important to understand the basic operations and techniques. This guide will provide you with step-by-step instructions on how to use a metal lathe, as well as some important safety tips to keep in mind while operating this machine.

    1. Prepare Your Workspace

      Before starting to use the metal lathe, make sure that your workspace is clean and organized. Remove any debris or tools that might get in the way, and clear a space around the machine for you to move around freely. This will help you avoid accidents and keep you working efficiently.

    2. Check the Lathe

      Before starting any operation, inspect the lathe and make sure that it is in good working condition. Check the belts, pulleys, and gears to make sure they are tight and properly aligned. Ensure that all guards and shields are in place, and make sure that the lathe is properly lubricated.

    3. Choose Your Tooling

      The type of tooling you will need depends on the type of operation you will be performing. For most basic operations, a center drill, roughing tool, and finishing tool will be sufficient. Make sure that your tooling is in good condition and that the cutting edges are sharp.

    4. Mount the Workpiece

      Mount the workpiece to the lathe using a chuck, a faceplate, or a center. Make sure that the workpiece is secure and that the center or the center drill is properly aligned.

    5. Adjust the Speed and Feed

      The speed and feed of the metal lathe are critical to the success of your operation. Adjust the speed and feed to match the material you are working with, the type of operation, and the tool you are using. Check your machine manual for recommended speeds and feeds.

    6. Start the Lathe

      Start the lathe and allow it to reach its full speed before starting any cutting operation. Make sure that the workpiece is rotating evenly and that there is no vibration.

    7. Perform the Operation

      Using the tooling you have chosen, perform the operation you want to achieve, whether it be drilling, turning, facing, or knurling. Make sure to follow the proper techniques and to use the correct tool for the job.

    8. Stop the Lathe

      When you have finished your operation, turn off the lathe and allow it to come to a complete stop. Remove the workpiece and any tooling, and check the results.

    Safety Tips

    When using a metal lathe, it is important to follow some basic safety precautions to avoid accidents and injuries. Here are some tips to keep in mind:

    1. Wear appropriate personal protective equipment, such as safety glasses and gloves, to protect yourself from flying debris and sharp edges.
    2. Keep your hands and other body parts away from the cutting area to avoid injury.
    3. Do not wear loose clothing or jewelry that can get caught in the machine.
    4. Use proper lifting techniques to avoid injury when lifting heavy objects.
    5. Make sure that all guards and shields are in place and that the lathe is properly lubricated to avoid equipment failure and injury.

    In conclusion, using a metal Lathe is a valuable skill for those interested in metalworking and machining. With proper preparation and the correct techniques, you can use a metal lathe to create precise parts and products. However, it is important to always follow safety procedures and to take precautions to avoid accidents and injuries while operating this powerful machine.

    In summary, the steps for using a metal lathe include: preparing your workspace, checking the lathe, choosing your tooling, mounting the workpiece, adjusting the speed and feed, starting the lathe, performing the operation, and stopping the lathe. Remember to follow safety tips such as wearing appropriate personal protective equipment, keeping your hands and body parts away from the cutting area, and making sure that all guards and shields are in place.

    By following these steps and guidelines, you will be well on your way to becoming an experienced metal lathe operator. Good luck and happy machining!

  • Using a Drill Press

    Using a Drill Press

    A drill press is a useful tool for drilling holes in wood, metal, plastic, and other materials. In this article, we’ll go over the basics of how to use a drill press for your DIY projects.

    1. Setting up the drill press

      Before using the drill press, make sure it’s properly assembled and the table is level. Check that the chuck key is securely stored and that the drill bit is tightly fastened in the chuck.

    2. Selecting the right drill bit

      Choose a drill bit that is appropriate for the material you’re drilling. For example, use a high-speed steel (HSS) bit for softwoods and a cobalt bit for hardwoods and metals.

    3. Adjusting the depth of the drill bit:

      Use the depth stop to control the depth of the hole. Turn the depth stop to set the desired length, then tighten the thumbscrew to lock it in place.

    4. Positioning the material

      Secure the material to the drill press table using clamps or a vise. Make sure it’s positioned correctly and that the drill bit will enter the material at the desired location.

    5. Turning on the drill press

      Turn on the drill press and let it reach full speed. Then, slowly lower the drill bit into the material, using the handle or foot pedal. Keep the drill bit level and straight as it enters the material.

    6. Drilling the hole

      Keep a steady pressure on the handle or foot pedal as you drill the hole. Once the drill bit has reached the desired depth, raise it back up to the top.

    7. Removing the drill bit

      Use the chuck key to loosen the drill bit and remove it from the chuck. Store the drill bit and chuck key in a safe place.

    8. Cleaning up

      Clean the drill press and work area after each use.

    Hafco Drilling Machine

    By following these steps, you’ll be able to use a drill press with confidence and achieve precise and accurate results every time. Just remember to always wear safety goggles and use caution when operating power tools.